
Ever wondered what makes Japanese cheesecake so special? If you’re a dessert lover, chances are you’ve heard of this marvel — often called “cotton cheesecake” or “soufflé cheesecake” — celebrated for its light, airy texture and deep, mild sweetness. Unlike traditional cheesecakes, which can be dense and heavy, Japanese cheesecake offers a fluffy, cloud-like bite that melts in your mouth. Whether you’re a baking novice or a seasoned pastry chef, mastering this treat can elevate your dessert game. Today, I’ll walk you through everything you need to know about making a perfect Japanese cheesecake—from ingredients to tips, and even some flavor variations.
The Allure of Japanese Cheesecake
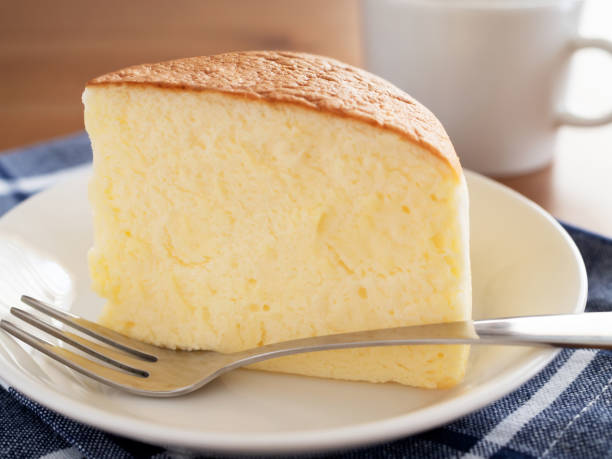
Japanese cheesecake strikes a beautiful balance between richness and lightness. It’s a fantastic choice for special occasions or just because you deserve a sweet break. Its signature feature is its unique texture: a delicate, airy crumb that resembles a sponge, yet with a creamy cheesecake flavor. The secret? A careful blend of whipped egg whites and cream cheese that creates a soft, souffle-like form.
In this guide, I’ll break down the essentials, guide you through every step, and share pro tips to ensure your cake turns out picture-perfect every time.

What is Japanese Cheesecake?
Japanese cheesecake, also known as “cotton cheesecake” or “soufflé cheesecake,” is a hybrid between traditional cheesecake and airy sponge cake. It’s characterized by its soft, melt-in-your-mouth texture, achieved through folding whipped egg whites into a cream cheese batter, generating a fluffy structure unlike any other.
Definition List:
- Cotton Cheesecake: A nickname highlighting its cloud-like fluffiness.
- Soufflé Cheesecake: Its airy texture resembles that of a soufflé, rising beautifully during baking.
- Key Characteristic: Light, delicate, and moist, with a slightly tangy taste from cream cheese.
Materials Needed for Perfect Japanese Cheesecake
Creating a successful fluffy dessert hinges on quality ingredients and precise measurements. Here’s a comprehensive list with details:
| Ingredient | Quantity | Notes |
|---|---|---|
| Cream cheese | 8 oz (225 g) | Full-fat, softened for easy mixing |
| Unsalted butter | 4 tbsp (60 g) | Adds richness, softened |
| Granulated sugar | 1 cup (200 g) | Divided for batter and meringue |
| Eggs | 4 large | Separated into yolks and whites |
| Milk | ½ cup (120 ml) | For smooth batter |
| Cake flour | ⅓ cup (40 g) | Sifted to avoid lumps |
| Cornstarch | 2 tbsp (15 g) | Stabilizes the sponge structure |
| Lemon juice or vinegar | 1 tsp | Helps stabilize egg whites |
The Step-by-Step Guide to Baking Japanese Cheesecake
1. Prep Your Equipment and Ingredients
Start by preheating your oven to 320°F (160°C). Line your cake pan with parchment paper, making sure to butter it lightly for easy removal. Use a 6-8 inch round pan for a classic size.
2. Cream the Base
In a heatproof bowl, combine cream cheese, butter, and milk. Gently melt over simmering water until smooth. Let it cool slightly before mixing with other ingredients.
3. Mix the Batter
Add egg yolks one at a time into the cream cheese mixture, stirring well after each addition. Sift in cake flour and cornstarch, folding gently until fully combined.
4. Whip Egg Whites
In a clean bowl, beat egg whites with lemon juice or vinegar. Gradually add sugar and continue whipping until stiff peaks form. This is crucial for the airy texture.
5. Fold Gently
In three parts, fold the whipped egg whites into the batter. Use a spatula and gentle motions to preserve the air bubbles. The batter should be smooth but light.
6. Bake
Pour the mixture into the prepared pan. Tap gently to remove air pockets. Bake in a water bath (placing the cake pan in a larger pan filled with hot water) to prevent cracking. Bake for about 60 minutes, or until a toothpick inserted centers out clean.
7. Cool and Serve
Let the cake cool gradually in the oven with the door slightly open. Chill in the refrigerator for a few hours before slicing. The result? A dreamy, fluffy cheesecake that’s both tangy and sweet.

Tips for Success
- Use Room Temperature Ingredients: Cream cheese, eggs, and butter should all be at room temperature to blend smoothly.
- Fold Gently: Overmixing can deflate the batter. Be delicate when combining whipped whites with the base.
- Bake in a Water Bath: This helps prevent cracks and ensures even baking.
- Don’t Overbake: The cake should have a slight jiggle in the center when done — it continues to set as it cools.
- Chill Before Serving: A chilled cake has a better texture and flavor.
Common Mistakes and How to Avoid Them
| Mistake | Solution |
|---|---|
| Overmixing the batter | Mix just until combined; be gentle |
| Not using a water bath | Always bake in a water bath to prevent cracking |
| Baking at too high a temperature | Stick to 320°F (160°C); high heat causes sinking |
| Forgetting to cool gradually | Cool slowly with oven door ajar to avoid cracks |
| Using cold ingredients | Use ingredients at room temperature for smooth mixing |
Variations and Flavor Twists
While the classic Japanese cheesecake is divine, here are some fun variations to try:
- Chocolate Japanese Cheesecake: Add 2 oz melted dark chocolate to the batter.
- Matcha (Green Tea) Flavor: Mix 1 tablespoon of matcha powder into the dry ingredients.
- Citrus Twist: Incorporate lemon or orange zest for a fresh flavor.
- Berry Swirl: Add fruit preserves or fresh berries carefully after pouring the batter into the pan.
- Vegan Version: Substitute dairy ingredients with plant-based alternatives like coconut cream and vegan cream cheese.
Wrapping It Up: Why You Should Try Making Japanese Cheesecake
If you love desserts that surprise your palate with their airy, melt-in-your-mouth texture, a homemade Japanese cheesecake is definitely worth the effort. It’s a balance of technique and gentle finesse—perfect for impressing guests or indulging in a personal treat. With the right ingredients, careful technique, and a dash of patience, you’ll be savoring a slice of culinary bliss in no time.
So, are you ready to bake your own cloud of happiness? Gather your ingredients, follow the steps, and don’t forget the tips. Happy baking!