
Hey there! If you’re someone who loves dessert adventures, then Baked Alaska might just become your new favorite treat. This stunning, show-stopping dessert combines cold ice cream with warm cake and a fluffy meringue topping — and it’s as delicious as it looks. Today, I’ll walk you through everything you need to know about making and mastering Baked Alaska, from ingredients to tips and common mistakes, so you can impress friends and family with this timeless classic.
What Is Baked Alaska?
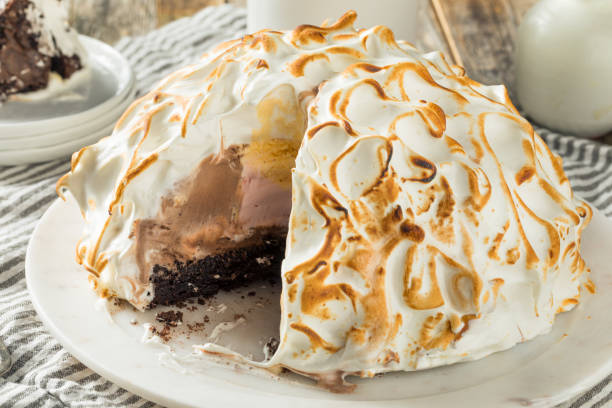
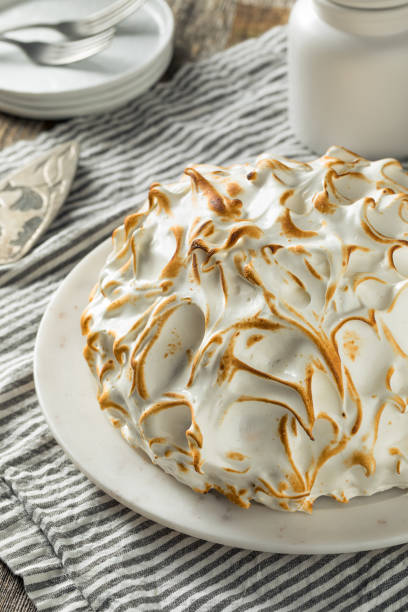
Baked Alaska is a fascinating dessert that originated in the United States in the late 19th century. It pairs ice cream and cake, encased in a thick layer of meringue, which is then briefly baked or torched until golden. The magic? The contrast between the icy center and the warm, caramelized topping.
In simple terms, Baked Alaska is a celebration of temperature contrasts: cold and hot, creamy and crispy, all in one bite.
Key elements of Baked Alaska include:
- Ice cream: Usually vanilla, but other flavors work well!
- Cake base: Light sponge or pound cake.
- Meringue topping: Whipped egg whites, sweetened and stabilized.
- Assembly: Usually involves freezing the assembled dessert before baking or torching the meringue.
Why Make Baked Alaska? The Benefits and Charm of This Classic
Baked Alaska isn’t just a pretty face — it’s an experience. Here’s why you should try making it at home:
- Impressive Presentation: Looks stunning and professional.
- Temperature Delight: The contrast of hot and cold excites the palate.
- Versatile Flavors: Customize with your favorite ice cream and cake flavors.
- Celebration Dessert: Perfect for birthdays, holidays, or special occasions.
- Fun to Make: Involves stages of freezing, baking/torch flame, and assembly, making it a fun culinary project.
Materials Needed for Making Baked Alaska
To embark on your Baked Alaska journey, gather these ingredients and tools:
| Materials | Details & Quantities | Notes |
|---|---|---|
| Ice Cream | 1 quart (flavor of choice) | Vanilla is classic, but consider chocolate, strawberry, or salted caramel for variety |
| Cake Base | 1 sponge or pound cake (about 9-inch round) | Use your favorite pre-made or homemade cake |
| Meringue | 4 large egg whites, ½ cup sugar | Stabilize with cream of tartar if desired |
| Additional Ingredients | Lemon juice, vanilla extract | For flavoring the meringue |
| Kitchen Tools | Mixing bowls, spatula, baking sheet, long-handled torch, oven | Freezer is crucial |
Step-by-Step Guide to Making Baked Alaska
1. Prepare Your Cake Base:
- Cut your cake into a shape that matches your ice cream and fits in your chosen mold.
- Freeze the cake for at least 30 minutes to firm it up.
2. Assemble the Ice Cream Dome:
- Sculpt or mold the ice cream into a dome shape using a bowl or mold.
- Place the ice cream onto the cake base.
- Encase the ice cream with a layer of plastic wrap, then freeze it solid for at least 4 hours or overnight.
3. Make the Meringue:
- Whip egg whites with a splash of lemon juice or cream of tartar until soft peaks form.
- Gradually add sugar while continuing to whip until stiff, glossy peaks form.
- Optional: Add vanilla extract for extra flavor.
4. Cover the Frozen Cake and Ice Cream:
- Remove the assembled cake and ice cream from the freezer.
- Spread the meringue evenly over the entire dessert, ensuring no gaps.
5. Final Touch:
- Quickly bake in a preheated oven at 500°F (260°C) for 3-5 minutes, or.
- Use a culinary torch to evenly brown the meringue exterior without melting the ice cream.
6. Serve Immediately:
- For best results, serve right after browning to enjoy the cold center with a warm, crispy exterior.

Tips for Success
- Work Quickly: Once the meringue is on, don’t delay baking or torching.
- Use Fresh Eggs: For fluffy, stable meringue.
- Freeze Properly: The dessert must be thoroughly frozen before baking or torching.
- Keep Meringue Cool: Keep it refrigerated until needed to prevent melting.
- Even Coating: Apply meringue generously, sealing the ice cream completely for a perfect exterior.
Common Mistakes and How to Avoid Them
| Mistake | Why It Happens | Solution |
|---|---|---|
| Not Freezing Enough | Ice cream melts during baking/torching | Freeze assemble for at least 4 hours or overnight |
| Incomplete Meringue Coating | Gaps allow melting and tearing | Cover evenly, seal all edges thoroughly |
| Overbaking | Melting ice cream | Bake briefly at high heat or torch with care |
| Using Warm Ingredients | Warm meringue or ingredients collapse | Use cold ingredients and work in a cool environment |
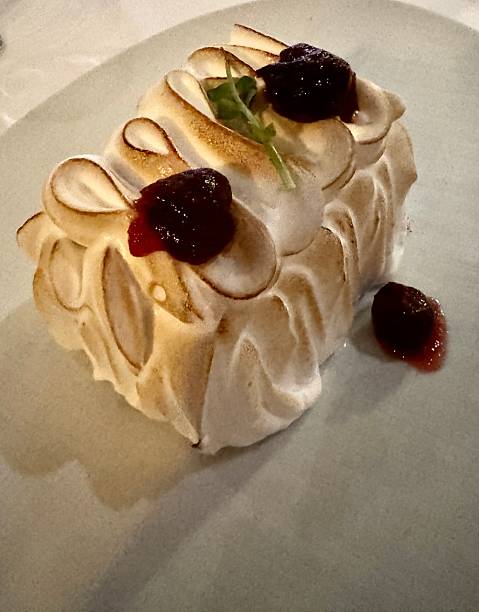
Variations and Creative Twists
Baked Alaska is highly adaptable. Here are some ideas to elevate your dessert game:
- Flavor Combinations: Try chocolate ice cream with brownie base or lemon sorbet with raspberry cake.
- Alcohol-Infused: Add liqueurs like Grand Marnier or Amaretto to your ice cream for an adult twist.
- Colorful Meringue: Add food coloring to the meringue for a vibrant look.
- Nutty Crunch: Incorporate chopped nuts or cookie crumbs into the meringue.
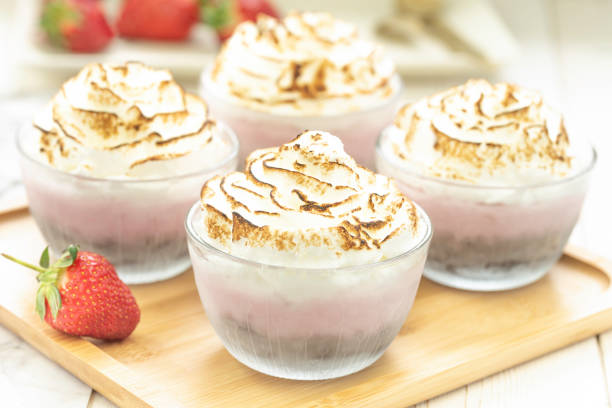
- Mini Baked Alaskas: Make individual portions using small ramekins or muffin tins.
Final Thoughts
Making a Baked Alaska at home might seem intimidating, but with proper preparation and attention to detail, it becomes a rewarding baking project that results in a show-stopping dessert. Remember to freeze thoroughly, work quickly with your meringue, and keep an eye on baking times. Whether you’re celebrating a special occasion or just craving a fun cooking challenge, Baked Alaska offers a perfect blend of elegance and tasty fun.
So, gather your ingredients and give this classic dessert a try — your friends and family will definitely be impressed!
Ready to wow everyone at your next celebration? Follow these tips and tricks, and you’ll master Baked Alaska in no time. Happy baking!


