
Ever wondered how to impress your friends at your next gathering with a fun and tasty dessert? Dirt cake might be just what you need! This no-bake, kid-friendly treat combines the playful look of dirt with the rich flavor of chocolate—perfect for parties, picnics, or just a sweet craving. Today, I’m going to walk you through everything you need to know to create the best dirt cake ever. From ingredients and tips for success to common mistakes and creative variations, I’ve got you covered. So, grab a spoon, and let’s dig in!
What Is Dirt Cake? An All-You-Need-to-Know Guide
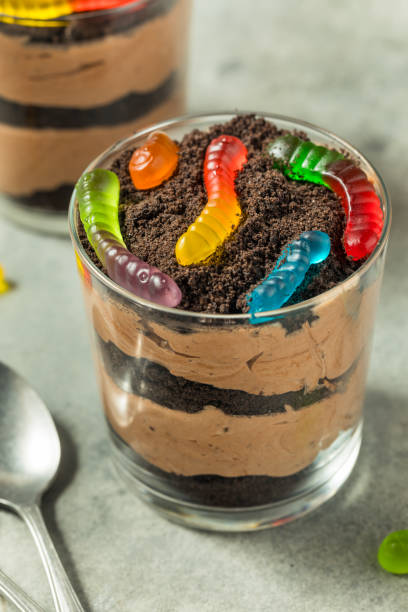
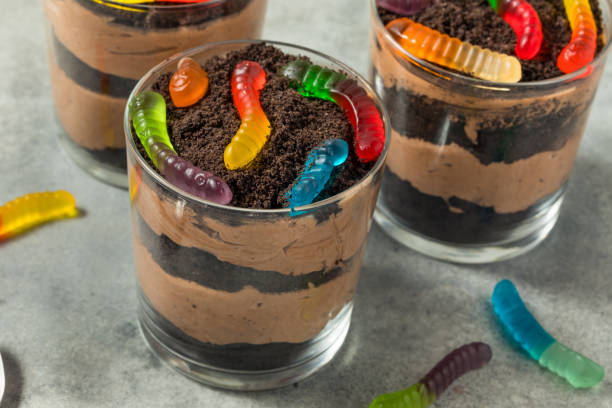
Dirt cake, also known as “Dirt Pudding,” is a dessert that’s designed to resemble a dirt mound, complete with edible “dirt,” “worms,” and “plants.” It’s typically layered with chocolate pudding, crushed cookies, and sometimes gummy worms or candies for a fun twist. Its appealing look makes it a favorite among kids, but adults love it too for its simplicity and scrumptious flavor.
Think of it as a no-bake, chocolatey treat that blends smooth pudding with crunchy cookie crumbles, topped with playful decorations. Making dirt cake is easy, quick, and doesn’t require advanced baking skills—which is why it’s often a go-to for busy families or novice bakers.
Essential Ingredients and Materials Needed
Before diving into the preparation process, it’s best to gather all your ingredients and tools. Trust me—prepping in advance makes the process a breeze.
Materials Needed
| Ingredient / Material | Quantity / Specification | Purpose |
|---|---|---|
| Instant Chocolate Pudding Mix | 2-3 packs (3.4 oz each) | Core flavor, creates pudding |
| Milk | 4 cups (for pudding) | To prepare pudding |
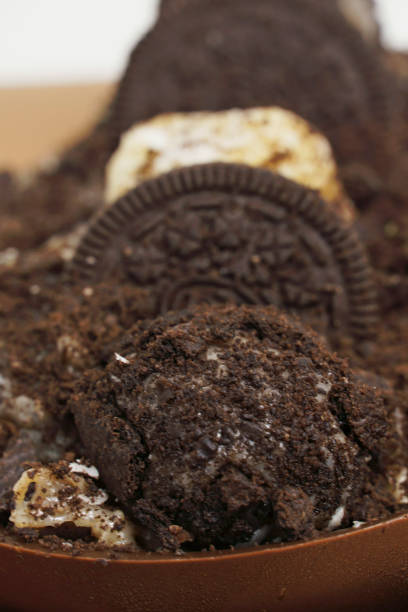
| Oreo Cookies or Similar Cookies | 24-30 cookies, crushed | Dirt base, crunchy texture |
| Gummy Worms (Optional) | 8-10 worms, gummy candies | Edible “worms” for fun |
| Whipped Topping (Whipped Heavy Cream or Store-bought) | 2 cups | For lightness and creaminess |
| Fresh or Artificial Green Candy or Gummy Plants | As desired | Decoration, “plants” |
| Clear Serving Trays or Pans | 1 large dish, preferably transparent | Presentation |
| Spatula / Spoon | For mixing and layering | Handling ingredients |
| Food Processor or Rolling Pin | For crushing cookies | Texture consistency |
Additional Optional Ingredients
- Crushed pretzels or chunks for added crunch
- Mini chocolate chips or candies for variety
- Cookie crumbs from different types (graham crackers, chocolate cookies)
- Edible glitter or sprinkles for extra flair
Step-by-Step: How to Make the Perfect Dirt Cake
Creating dirt cake is almost foolproof once you know the steps. Here’s a straightforward guide:
- Prepare the Pudding:
Mix your instant pudding with cold milk following package instructions. Whisk until thickened and smooth. Allow to set in the fridge for 5-10 minutes. - Crush the Cookies:
Using a food processor or placing cookies in a plastic bag and crushing with a rolling pin, make fine crumbs. These crumbs mimic dirt and add a satisfying crunch. - Mix the Pudding and Whipped Topping:
Gently fold the whipped topping into the pudding to make it lighter and creamier. This step is optional but highly recommended for a fluffier texture. - Layer the Components:
In your serving dish, start with a layer of cookie crumbs, then spread a layer of pudding mixture. Repeat these layers to your desired height, finishing with cookie crumbs on top for a dirt-like appearance. - Decorate and Add Worms:
Place gummy worms on top or embed them within layers for fun surprises. Add candy plants or sprinkles to mimic tiny plants growing out of the dirt. - Chill Before Serving:
Refrigerate for at least 2 hours. Chilling helps the flavors meld and the cake set firm enough for serving.
Tips for Success
- Use high-quality ingredients: Fresh cookies and good pudding mixes make a noticeable difference in flavor.
- Crush cookies finely but not too powdery: Larger crumbs give texture, while finely ground crumbs look more like real dirt.
- Layer evenly: Use a spatula to spread layers smoothly for an attractive presentation.
- Chill thoroughly: Giving your dirt cake adequate chilling time enhances flavor and stability.
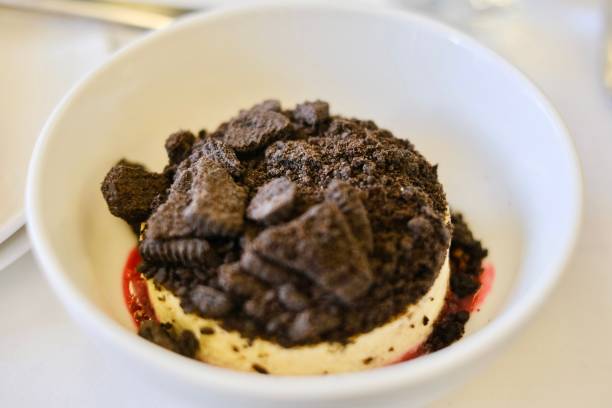
- Get creative with decorations: Use different candies, edible dirt (like crushed cookies mixed with cocoa powder), or even edible soil toppings for a realistic feel.
- Adjust sweetness: Taste your pudding before layering; add sweeteners or flavorings if needed.
Common Mistakes and How to Avoid Them
| Mistake | How to Avoid |
|---|---|
| Not chilling long enough | Chill for at least 2-3 hours; overnight is best for flavor layering |
| Using overly chunky cookies | Crush cookies finely for a more authentic dirt appearance |
| Overly wet or runny pudding | Follow pudding package instructions carefully; don’t add too much milk |
| Forgetting toppings or decorations | Save gummy worms and candies for last, and don’t overdo it |
| Skipping steps or rushing | Follow the steps in order for even layers and better flavor integration |
Creative Variations to Elevate Your Dirt Cake
Want to switch things up or make your dirt cake more personalized? Here are some ideas:
- Healthy Twist: Use crushed graham crackers, unsweetened cocoa powder, and Greek yogurt instead of pudding.
- Flavor Variations: Incorporate peppermint or caramel pudding for different flavors.
- Themed Decorations: For holidays or birthdays, add themed candies, sprinkles, or fondant shapes.
- Vegan or Gluten-Free: Use plant-based pudding options, gluten-free cookies, and vegan whipped topping.
- Mini Dirt Cups: Prepare individual servings in small cups for parties or kids’ lunches.
Summary and Final Tips
Dirt cake is a delightful, fuss-free dessert that combines fun visuals with amazing flavors. Whether you’re making it for kids’ birthday parties, holiday gatherings, or just because you crave something sweet and playful, you can’t go wrong.
Remember, the key to a perfect dirt cake lies in quality ingredients, careful layering, and creative decorating. Make sure to refrigerate enough for flavors to meld, and don’t be shy about customizing ingredients to your taste.
So, go ahead—dive into making your own dirt cake and surprise everyone with this adorable and delicious treat! Happy baking (and digging)!
Ready to get started? Gather your materials, follow these tips, and have fun creating your very own dirt cake masterpiece. Happy dessert-ing!


